Wednesday, February 26, 2020

Photoshop - Animal Skin Swap

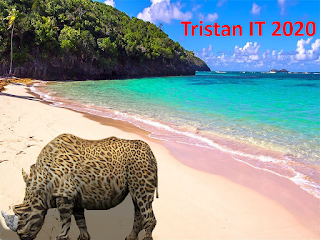
Reopard
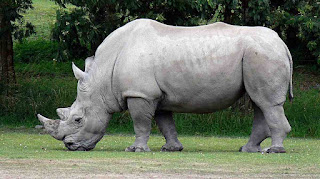
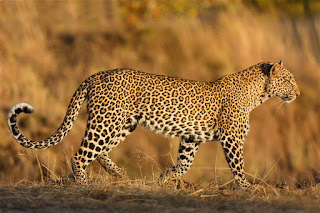
Original Rhino Original Leopard
1: Download a rhino image and a leopard image.
2; Place down the rhino then place the leopard image overtop, you can optionally use 50% opacity to make it easier to see.
3: Add a layer mask to both the images.
4: Go to filter at the top, then liquify while on the Leopard image.
5: Select the Rhino layer, set opacity to 50%, and try to match the leopards body with the rhinos body as best as you can.
6: Remove the leopard's background, and any excess parts that arent on the rhino.
7: Set the leopard layer to Multiply mode.

8: Go to layer at the top of photoshop, click add adjustment layer, and choose brightness and contrast.
9: Set the brightness to 26 and contrast to 0.

10: Use the clone stamp tool and adjust any pieces of the leopard skin that are too strecthed on the rhino.
11: Remove the background of the Rhino image

12: Add a custom background and your blog URL
13: Export as PNG and you are finished.
                                                                                                                   Bolphin
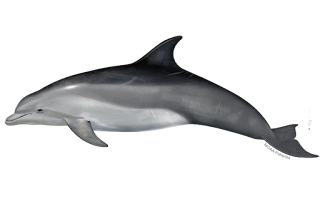
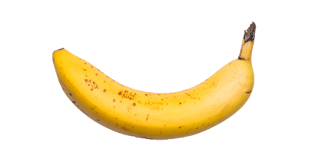
Original Dolphin Original Banana
1: Download Bottlenosed dolphin image and an image of a banana.
2: Lower the opacity of the banana image to 50%, then press "Ctrl-T" and resize the banana to cover the dolphin.
3:Click Filter at the top of photoshop, then click liquify while on the Banana layer.
4: While using the liquify filter, drag the texture of the banana overtop the dolphin.
5: Set the Banana's layer to the "Soft Light' mode
6:Click layer at the top of photoshop, then click new adjustment layer, and click on "Brightness and Contrast"
7: Set the brightness to -14, and contrast to 100
8: Add custom background and blog URL.
9: Export as PNG.
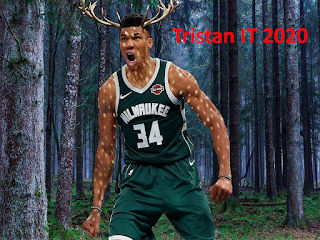
                                                                                                            Stag Giannis
Original Stag Original Giannis
1: Download an image of a stag and Giannis Antetokounmpo
2:  Place down the image of Giannis, then manouver "Ctrl-T" the stag overtop with an opacity of 50%, and line it up to where you think it looks good
3: Click on the stag layer and go to layer > Layer mask at the top of photoshop.
4: Click on the stag layer mask, erase everything, and click on the brush tool "B" and make sure to have white selected as the color.
5: Use the brush tool and draw the stag skin over Giannis' skin. 
6: Once the Stag skin is ontop of Giannis' skin, click on the stag layer and set it to the "Hard Light" mode.
7: Add Blog URL and Custom background. 
8: Export as PNG.

Tuesday, February 11, 2020

Photoshop Morphing - Custom Tutorial

Original Monkey
Original Cat
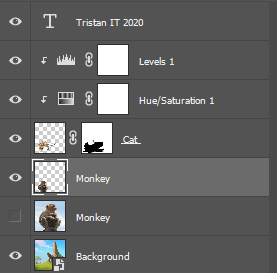
1: I started by cutting out the background of the stock cat image.
2: I then used the lasso tool and traced around the cats head.
3: I used "Ctrl-T", lowered opacity to 50% and resized the cats head to fit ontop the monkey
4: I used the eraser tool to get rid of excess cat.
5: I went to adjustment layers and selected levels.
6: I put the midtone to .53 and output to 11
7: I used "Ctrl-Alt-G" to create a clipping mask.
8: I added another adjustment layer of hue and sateration and set the hue to 2, saturation to -62, and lightness -18, and used Ctrl alt G to create another clipping mask.
9: I added my blog url and changed the background.

Friday, February 7, 2020

Photoshop - CassoGirafurtle

Original Giraffe Original Turtle Original Cassowary
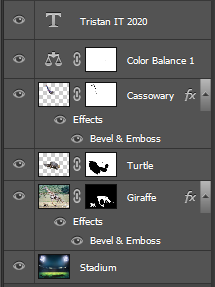
1: I started by placing the giraffe down and cutting out the background, while leaving the lions and the giraffe's legs visible.
2: I placed down the turtle, lowered opacity to 50% and used "Ctrl-T" to transform it so the shell would fit in with the giraffe's legs
3: I placed down the cassowary, lowered opacity, and tilted the head to match up with the turtle's shell.
4: I cut out the backgrounds of the turtle and cassowary, while leaving the turtles shell and cassowary's neck and head.
5: I used the clone stamp tool to blend the giraffe's legs with the turtles shell
6: I clone stamped the cassowary and turtle together at the neck
7: I added the custom stadium background.
8: I added in colour balance to make the image more vibrant with the settings: Cyan -12, Magenta -2, and yellow -3.
9: I used the burn tool to add shadows below the animals.
10: I used the dodge tool to lighten the neck area of the cassowary.
11: I added bevel and emboss to the cassowary and giraffe.
12: I added my blog url as a watermark for the finishing touch.

Predicted grade -plus colour and error fix


Thursday, February 6, 2020

Photoshop - CrocoFrog

Original Frog Original Crocodile
1: I started by opening a 1024x768 pixel photoshop project and placed the Croc image then used a layer mask to get rid of the background.
2: After getting rid of the background on the Croc image I placed the frog image down.
3: I used "Ctrl-T" and lowered the croc's opacity to 50% to resize the croc's head and place it over the frog.
4: Next I used the clone stamp tool "S" and held down "Alt" to select a piece of skin similar to the frog's eyes to blend the frog's eyes and croc's head together
5: Next, go to the top of photshop, hit "layer," hit "new adjustment layer", and add "colour balance" with the settings -13, 0, -100 with preserve luminosity enabled.
6: After that, go to the top of photoshop again, go to "layer", and click on "layer mask" whilst having the frog layer active, also do it for the croc layer.
7: I  added a "layer mask" to the color balance and got rid of the color balance on the Croc's teeth and tongue to make them look normal.
8: I used the Dodge tool "O" to lighten a few places on the Croc to make the colors mix better.
9: Next I clicked on the layer mask for the frog, and removed the background, I also did this for the croc.
10: I added a custom background for the CrocoFrog to reside in.
11: I used the burn tool "O" on the background to add a shadow to the Croc's head so it wasn't out of place.
12: Lastly, I added my blog address for a watermark.

Wednesday, February 5, 2020

Tuesday, February 4, 2020

Photoshop Frame Animation