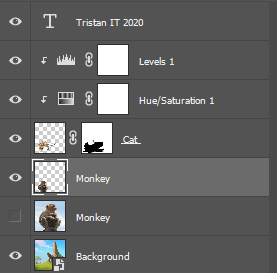
1: I started by cutting out the background of the stock cat image.
2: I then used the lasso tool and traced around the cats head.
3: I used "Ctrl-T", lowered opacity to 50% and resized the cats head to fit ontop the monkey
4: I used the eraser tool to get rid of excess cat.
5: I went to adjustment layers and selected levels.
6: I put the midtone to .53 and output to 11
7: I used "Ctrl-Alt-G" to create a clipping mask.
8: I added another adjustment layer of hue and sateration and set the hue to 2, saturation to -62, and lightness -18, and used Ctrl alt G to create another clipping mask.
9: I added my blog url and changed the background. |
 |
No comments:
Post a Comment